Japanese chef knife #2 A walkthru as I work on it - lots of pics

The Best online firearms community in Louisiana.

Member Benefits:

  • Fewer Ads!
  • Discuss all aspects of firearm ownership
  • Discuss anti-gun legislation
  • Buy, sell, and trade in the classified section
  • Chat with Local gun shops, ranges, trainers & other businesses
  • Discover free outdoor shooting areas
  • View up to date on firearm-related events
  • Share photos & video with other members
  • ...and so much more!
  • cbr900son

    Well-Known Member
    Rating - 100%
    1   0   0
    Nov 26, 2010
    539
    16
    broussard la
    So I made a deba style japanese knife for my wife for her Birthday and wanted to change a few things around and do another japanese chef knife.


    Drawing and cutting out a rough shape. I ended up shortening the blade some and leaving more on the tang. This is 1/8" 1084 steel thats 2" wide. It should make a really nice all around chef knife.

    IMG_0492.jpg


    Making sure the grinder is squared up.

    IMG_0493.jpg


    Profile ground out

    IMG_0494.jpg


    Blue layout fluid along the edge so I can use my senter scribe to see the middle exactly and it shows alot better with the layout fluid.

    IMG_0495.jpg


    IMG_0496.jpg


    Working the grind line up and as it goes up im getting close to the center on the edge.

    IMG_0497.jpg


    I want this knife to blend in everywhere no ricasso or sharp lines anywhere so i ground past where the edge will stop.

    IMG_0498.jpg


    I dont grind to the exact center. I leave between .02" and .03". The reason for this is if it was ground all the way there is a very good chance during heat treat of some warping on the thinner metal.

    IMG_0499.jpg


    Before I start blending all the grind lines in

    IMG_0500.jpg


    After I start blending

    IMG_0501.jpg
     

    cbr900son

    Well-Known Member
    Rating - 100%
    1   0   0
    Nov 26, 2010
    539
    16
    broussard la
    Here Im using more layout fluid so I can scribe lines easily seen to make the tang section. I also founda plactic thingy that was the perfect radius for what I wanted and used it to scibe a line also.

    IMG_0502.jpg


    IMG_0503.jpg


    Starting to cut and grind closer and closer to the marks. Also this will be part of the handle. I plan on going ebony with a copper spacer and stabalized koa.

    IMG_0504.jpg


    IMG_0505.jpg


    IMG_0506.jpg


    This is a test handle on the shape and size out of cheap wood scraps but gives a semi-idea of how it will look

    IMG_0507.jpg


    A 3" tang will be good with some heavy duty slow setting epoxy and I will use a burn in fit in the tang. Makes for a super tight fit. (Kind of a pain since its not to easy to get off afterward for the rest of the process)

    IMG_0509.jpg


    A special clamp so I can make sure I file it nice and flat so it fits up against the handle real nice

    IMG_0511.jpg


    Lots of hand sanding is needed for a nice finish.

    IMG_0512.jpg


    Drilling holes. There will be no pins. I just like the thought of the epoxy going thru the tang. FYI i usually use either acraglass or a 2 -ton slow setting epoxy I order online. I dont use the stuff you can get locally cause I prefer somethign that takes awhile to dry so I can clean up anything that oozes out easily. Also the local stuff doesn'y get nearly as hard as the stuff I use. The handle will break in pieces before this epoxy does!!

    IMG_0515.jpg


    Cutting pieces of wood to length and laying it on top to see if the combo will look good. I like it!

    IMG_0518.jpg


    I leave the wood oversize so I dont have to worry about small mistakes. Here I drilled holes and using my ghetto wood broach to make quick work of everything.

    IMG_0520.jpg


    IMG_0521.jpg


    Small fine files and a file brush to keep them clean as they clogg almost every few passes. For a super tight fit you need to make this as super precise as possible so slow and steady is the key here. On the other pices you dont have to be so super precise as you wont see and it just gives the epoxy more to grab onto but this piece will be what you see meeting up against the blade.

    IMG_0522.jpg


    I cheated on the copper with my mill lol

    IMG_0523.jpg


    Super accuarcy is nice!

    IMG_0524.jpg


    Tang fits nicely. The wood and copper are way oversized right now at 1.5" x 1.5". Plenty of material to shape and work with.

    IMG_0526.jpg


    You can see the discoloration from burning the tang into the koa. This sand off real easily. I basically crill a slot almost the right size then heat the tang up and workit in the wood for a super tight fit.

    IMG_0526.jpg


    Started workign the ebony spacer to the octagon shape and size I want. The pic makes it look all lobsided or something bad pic I guess.

    IMG_0528.jpg


    Quick test fit.

    IMG_0532.jpg


    Start shaping the rest of the handle semi close to final shape. I left about 1/8" on each side So i can hand sand and make sure it nice and flush.

    IMG_0533.jpg


    Need to run and get more sandpaper but this is where Im at as of now. Got alot more hand sanding to do both before and after heat treating the blade.
     
    Last edited:

    Storm52

    Well-Known Member
    Rating - 100%
    3   0   0
    Mar 18, 2009
    2,159
    36
    Shreveport
    I have a greater appreciation as to why the cost of quality cutlery is beyond my reach. Thank you for sharing the process.
     

    cbr900son

    Well-Known Member
    Rating - 100%
    1   0   0
    Nov 26, 2010
    539
    16
    broussard la
    I have a greater appreciation as to why the cost of quality cutlery is beyond my reach. Thank you for sharing the process.
    Yeah after starting to make them I have a whole new appreciation for a high end knife. Another thign thats is super important is the heat treatment and tempering afterward. If your joe blow knife company making a batch of 1000 you are more worried about less warpage out of the batch then the absolute perfect heat treatment on each one. I think 440c stainless got a bad name because of this. Its a pretty good steel. Not the best but not bad. The problem is stainless steel wise its cheap and the heat treatment is a lot easier and a whole lot cheaper then other stainless steels so a lot of garbage companies use it for knives and gave it a bad name.

    For those wondering a handmade knife can be anywhere from 5 hrs for a decent little edc with no bells or whistles to upwards of 40+ hrs for really high end knives. Ive heard of some ppieces taking a couple hundred hours with all kind of engraving, carving, and its really blade art! Ive got about 15 hrs into this one and probably about 60-70% finished. I take my time cause if I rush i'm bound to screw something up badly.

    That is pretty amazing. Thank you for taking the time to document the process in such detail.

    No problem. I know I love seeing people do the same wether it be knives, guns, woodworking or whatever. Its kinda cool IMO to see how it done and how people do it differently.
     
    Last edited:

    my-rifle

    I make my own guns.
    Rating - 100%
    5   0   0
    Dec 12, 2007
    3,135
    38
    Jefferson Parish
    It's a beautiful knife, and I seriously am considering trying my hand at it, but the handle seems longer than necessary. Is that the Japanese style?

    {edit}

    Never mind.

    Funayuki_deba_knife_Sakai_Yusuke_13_5cm.jpg
     
    Last edited:

    returningliberty

    Well-Known Member
    Rating - 100%
    13   0   0
    Nov 8, 2009
    3,023
    36
    Hammond, LA
    Very good work man. I've never tried the stock removal method. How do you like it compared to forging?

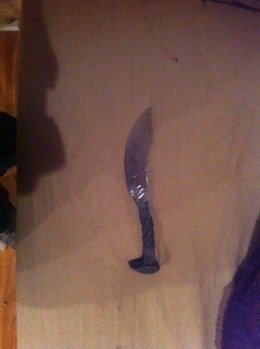
    This is one of the knives I banged out a a couple months ago from a railroad spike (pre treated and sanded, don't have the finished picture on my phone). My hammer control isn't very good, but a guy like you could probably pick it up fast.

    What sand paper do you use? My finished products aren't nearly as pretty.
     

    Attachments

    • ImageUploadedByTapatalk1330127766.478845.jpg
      ImageUploadedByTapatalk1330127766.478845.jpg
      8.9 KB · Views: 94

    cbr900son

    Well-Known Member
    Rating - 100%
    1   0   0
    Nov 26, 2010
    539
    16
    broussard la
    It's a beautiful knife, and I seriously am considering trying my hand at it, but the handle seems longer than necessary. Is that the Japanese style?

    {edit}

    Never mind.

    Funayuki_deba_knife_Sakai_Yusuke_13_5cm.jpg
    Thats close to what I was aiming for with some changes made. I went with a double sided western grind vs the chisel grind they use. The handle is long for now. I'm not done yet there. Id rather have more then needed and cut sand off later then not have it and realize later I want more handle length. Should be a 8" blade with around a 5 - 6" handle when done. Got a lot of handsanding to do before heat treat which hopefully will be sunday as I plan to go shoot tomorrow with my dad and nephew over at Sherburne now that the weather isn't so cold. We will see. Off to do a little more sanding.

    Very good work man. I've never tried the stock removal method. How do you like it compared to forging?

    This is one of the knives I banged out a a couple months ago from a railroad spike (pre treated and sanded, don't have the finished picture on my phone). My hammer control isn't very good, but a guy like you could probably pick it up fast.

    What sand paper do you use? My finished products aren't nearly as pretty.

    I understand the hammer control thing. Im working on it myself. Its harder then it sounds heh. Ive done a few myself and after I order a new heat treat oven Ill prob work on forging equipment.

    27276452.png


    As for sandpaper norton and 3m are what I use mainly just because I live like a mile from home depot. Now if you want what 95% of the knifemakers swear by then

    http://www.supergrit.com/products/products_sheets-brownredao.asp

    Ive heard nothing but great things from some really well known and respected makers. Not sure what kind of difference it can make.
     
    Last edited:

    cbr900son

    Well-Known Member
    Rating - 100%
    1   0   0
    Nov 26, 2010
    539
    16
    broussard la
    OK this is the part where you really can tell the difference between a custom and mass produced knife. Hand Sanding!!! Lots of it. A lot of makers hate it but I turn on my radio and just kinda zone out. Its kinda stress relieving to me. THis will also majorly affect your fit and finish on a knife.

    I start off with 150 grit at a angle toward the tip.

    IMG_0534.jpg


    Next I move up to 220 from spine to edge. The reason for the directions is simple. If I see a scratch at a angle toward the tip I know to sand some more in that area. Ill know its a 150 grit scratch vs a 220 from the direction. Lots of light and lookign at the blade from all kind of angles will reveal these little scratches here and there. Take your time here and the next grit seem alot easier. It also will make the end product alot better. Some knives do fine with a rougher finish then others. This is also the reason you see so many knives with a blade coating or light grey etch/sandblast coating on manufactured blades. They rough grind them the hide the scratches. Now a custom maker can do the same thing and not that there is anything wrong with it. BUT if you see a mirror polish on a custom knife I can promise you your looking at hrs of sanding.

    IMG_0536.jpg


    Since this knife has a slight convex and blended in. I use the side of my sanding block that has a slight radius in it to get more contact with the blade vs the straight side which is better at getting certain small areas that need to be toughed up.

    IMG_0537.jpg


    IMG_0538.jpg


    A nice clean 220 grit hand rubbed finish. This is where I stop before heat treating usually.

    IMG_0539.jpg


    Now I clean it up to remove all the oils and fine dust on the blade form my hands etc. I have a large box of gloves for times like this when it matters.

    IMG_0540.jpg


    When you heat treat a knife it leaves "scale" on the outside from the high temps reacting with the carbon and other elements in the metal. This can be a pain to clean sometimes so I use this. BTW I love these little brushes and could buy stock in the company that makes them. I use them for wood finishes, this, permalyn coatings etc etc

    IMG_0541.jpg


    Its water based and applys a little weird but I find cleaning the blade real well makes it alot easier. Almost all of it will come off since its water based when quenching during heat treating and makes clean up after heat treating alot easier! Good clean sanding also makes cleanup easier cause the scale doesnt have big gouges or scratches to get into to be sanded down to. Think if you put paint in a scratch in wood. You would have to sand down to get it out.

    IMG_0542.jpg


    Gonna let this side dry overnight and probably get a chance to do the otherside tomorrow. Not sure how much I will get done tomorrow but we will see.
     

    cbr900son

    Well-Known Member
    Rating - 100%
    1   0   0
    Nov 26, 2010
    539
    16
    broussard la
    Got done heat treating the blade which for 1084 is heating to critical temp then quenching. Critical temp is the point where the metal turns non magnetic. For 1084 that is 1500 degrees fahrenheit. 1084 doesn't require a soak time. Some metals require you to keep it at that temp anywhere from 5 minutes to a hr. Now quenching involves using a quenchant. Can be anything from a quench oil to water to canola or vegtable oil. Even motor oil cna be used. Another thing is some oils used need to be warmed or a salt water brine solution instead of plain water. The reason for warming the oil is to cool it faster. Some metals have to be cooled to under 800 degrees within a second or two after coming out of the heat treat oven/forge. This means one quick motion from oven/forge to quench. This is also why I think mass produced knives can't have the same heat treat quality as a custom knife 99% of the time. Currently the knife is in the second tempering cycle. The blade right after hardening is so hard it is like glass. It can actually break in a clean line since it doesnt want to give at all being so hard. So you bring the hardness back just slightly with tempering to get right where you want it at. 2 tempering cycles of 425 degrees over 2 hrs each should put me right at 58 rc hardness which is perfect for this knife. A big chopper might want a rc hardness around 54-56 just for reference. Since this knife doesn't see the impact of a camp knife or chopper Id rather it be a little harder so it stays sharper longer.


    PS - yes I said you warm the oil to around 140 degrees to cool the blade of FASTER. I know it seems if it was colder it would work better. The reason to warm it is it doesnt bubble from boiling nearly as much from the extreme heat when its warmed some. The boiling/bubbling causes a gas jacket to form around the balde where the bubbling is. Basically the bubbling on the blade means less quenchant touching and cooling the blade and we need it to cool down fast!
     
    Last edited:

    sonanth

    Well-Known Member
    Rating - 100%
    10   0   0
    Mar 2, 2009
    956
    18
    New Iberia, LA
    PS - yes I said you warm the oil to around 140 degrees to cool the blade of FASTER. I know it seems if it was colder it would work better. The reason to warm it is it doesn't bubble from boiling nearly as much from the extreme heat when its warmed some. The boiling/bubbling causes a gas jacket to form around the blade where the bubbling is. Basically the bubbling on the blade means less quenchant touching and cooling the blade and we need it to cool down fast!

    As soon as I read that above, I was working up to that. Thanks for clarifying; probably wouldn't taken a little while to work it out.
     

    cbr900son

    Well-Known Member
    Rating - 100%
    1   0   0
    Nov 26, 2010
    539
    16
    broussard la
    So now time for sanding some more! WEEEEEEEEE

    This is straight after tempering. The a lot of the anti- scale compound came off during quench and the rest comes off with 30 seconds worth of sanding with 22 which is where I stopped prior to heat treating.

    IMG_0544.jpg


    IMG_0546.jpg


    Now this looks ok to some. This is 220 grit finished the length of the blade. The reason I sanded and showing this is so you know how much time went into the knife your looking at wether its a custom or production. Sanding straight down from spine to edge gives a nice even satin finish look and length wise makes it look better then it really is. Now lngth wise is nice once your into the 400-600 grit and up and in fact you more or less polishing so you want all your sanding after this point to be in the same direction.


    PS - the dust you see on the towel is from the sadnign. I actually change the paper towel for each grit so it doesnt make micro fine scratches etc.
    IMG_0545.jpg


    Notice the 320 grit doesnt look as nice as the 220 done the length of the blade. I guess its a eye trick or something but this is a better finish. Some makers and companies use these little tricks to their advantage to save time in production. I do this as a hobby that semi- pays for itself so I can do one at a time and just kind of focus on each one. No rush on me either so less pressure and less chance to make a mistake lol.

    IMG_0547.jpg


    BTW sanding now is a LOT harder! The steel has been hardened and takes a lot more pressure and work to sand. Taking a 15 minute brake to let my fingers rest then its time to start on 400 which is the bare min Ill go even for a hunter or camp knife. I want to look into stone washing and sand blast finishes for some blades. I think it would be nice to have more options and some of them look better on say like a rustic camp knife.

    Completed 320 and break time. 400 grit changes some things on the sanding process.
     

    cbr900son

    Well-Known Member
    Rating - 100%
    1   0   0
    Nov 26, 2010
    539
    16
    broussard la
    When I stop to rest my hands and fingers Ill update

    At 400 grit you start more of a polish/sanding then anything. Around this point some makers recommend oil or windex as a lube for a type of wet sanding effect. I use oil at 400 cause it helps not clog up the paper instantly and it makes a fine slurry that acts as a polishing compound almost. Gloves are nice so you dont get oil all over your hands and you dont want to mar your finish any.

    IMG_0549.jpg


    This is the slurry

    IMG_0550.jpg


    At this point I sand and polish lengthwise only.

    IMG_0551.jpg


    Now at 600 i switch to windex. This lubes the blade like wet sanding and also water isnt pure unless you get distilled water etc to wet sand with (our water is horrible here!). Another thing is windex has ammonia which neutralizes acid and actually stops any patina or rust from forming from sweat, chemicals, acid rain in my shop... You get the point. Today is a coler day and Im not sweating but just good practice to do the right thing even when its overkill.

    IMG_0552.jpg


    The nerd in me likes to try little stupid changes like a new sandpaper which performed pretty good. I guess it's like a fisher trying a new bran of line etc. When your really into somethign you will do nerdy things liek this to get any advantage you can heh.

    IMG_0553.jpg


    This is half way thru the 600 grit and your stating to work toward a mirror finish. Right now it looks like a hazy mirror right after a hot shower and as you work your way up its starts getting clearer and clearer.

    IMG_0554.jpg


    Oh I forgot to say Im not neglecting the spine either.

    IMG_0555.jpg


    Got a litlle research to do to see how I want to finish this knife exactly.
     

    cbr900son

    Well-Known Member
    Rating - 100%
    1   0   0
    Nov 26, 2010
    539
    16
    broussard la
    Decided to acid etch the blade so the maintenance will be low and I can copy a kurouchi finish. This is ferric chloride diluted 4 to 1 with water. The bent metal hooks hoot into the blade to dip it in and pull it out.

    IMG_0557.jpg


    IMG_0558.jpg


    When etching with acid at this strength you usually dip for a minute or two rinse and rub then repeat till you have what you like. You can also use vinegar overnight. This only works on high carbon blades. This etch will keep the acid from foods from etchign it unevenly. Imagine cutting tomatoes, lemons, apples etc and the acidity in the juices will react with the blade just like the acid dip I used. Most cooks either wash and dry their blade immediately afterwards or just live with the patina as part of the look fo the knife. You can always polish the blade back to shiny. People deal with the patina issue because very very few stainless steels can match the performance of a high carbon blade and the ones that can are expensive and very expenisve to heat treat requiring things like cryo quench in dryice and denatured alchol etc. So makers usually have to charge more for these paticular steels. Now dont get me wrong Ill be trying them out once I get my heat treat oven but it will make the cost go up a decent bit. Also I like the slightly used look but thats just my personal preference.

    IMG_0559.jpg


    The edge was left about .025" thick (close to a dime thickness) to resist warping in heat treat and here Im removing a ever so slight amount to get this close to where I can sharpen in later (always sharpen as the last thing so you dont cut yourself when working on it.

    IMG_0560.jpg


    Now where the ebony, copper and koa meet I need to make sure they are 100% perfectly flat to make the fit and finish perfect! Polished granite is 100% flat and when you tape down sheets of sandpaper make this a easy job.

    IMG_0561.jpg


    This is ebony at 120 grit

    IMG_0561.jpg


    This is worked up to 1000 grit with a light buff

    IMG_0565.jpg


    Ebony sanded and buff really is beautiful. I want to work with it more! Maybe even a whole handle of it. I Didnt take any pics but I mixed up some epoxy and have the handle clamped up like 100 different ways lol. It will take overnight for it to cure enough to handle and finish working the handle shape to final size and finish.
     

    cbr900son

    Well-Known Member
    Rating - 100%
    1   0   0
    Nov 26, 2010
    539
    16
    broussard la
    Well major design changes!!!!!! Went to visit my buddy who is a manager at a sushi restaurant and asked one of the main chefs there to take a look at my knife. Guy seemed super knowledgeable about knives. Said he under stood what I was going for and the octagon handle was great lookign and feeling but didnt fit the knife... I was like what?!?! He showed me some of his octagon handle knives and pointed out how my tang was a little thicker then usual and very cleek and curved where as most of his he showed me had a 90 degree straight to a more narrow tang. So after taliking to him some maore came home and started to round it off and ended up with this. You know he was right this does look sleeker and better suits the knife to handle transtition.

    IMG_0566.jpg


    IMG_0567.jpg


    for comparison

    images


    and

    knives-7.jpg


    The curve vs 90 degree does make a big difference
     

    cbr900son

    Well-Known Member
    Rating - 100%
    1   0   0
    Nov 26, 2010
    539
    16
    broussard la
    Ok now to working the handle!!! Im basically gonna sand at 120 grit and go to 2000 grit then some real light buffing to finish it off. Ill show photos of the different grits and buffing.

    after 120 grit

    IMG_0571.jpg


    after 220

    IMG_0572.jpg


    after 320

    IMG_0575.jpg


    400...

    IMG_0576.jpg


    and I forgot to take pics so here is 2000 grit with a light buff. No wax no oils no nothing. The natural shine is just from lots of work lol.

    IMG_0578.jpg


    IMG_0582.jpg


    My cell phone pics just dont do it justice. It looks like its wet and 3d! You have to see it in person to appreciate it! Later today will work on sharpening it and see how sharp we can get! Fun Fun!!!
     

    cbr900son

    Well-Known Member
    Rating - 100%
    1   0   0
    Nov 26, 2010
    539
    16
    broussard la
    Posting gives me a little break usually to rest my hands. SO im sitting here about to sharpen the blade and wondering.. Should I sand the etch off and just polish the blade up fully? or leave as is and just sharpen it up? What you guys think?
     
    Top Bottom